Author name: Pushkar Pandey

Artificial Intelligence, Digital Transformation, Technology & Innovation

What Is GEO (Generative Engine Optimization)?

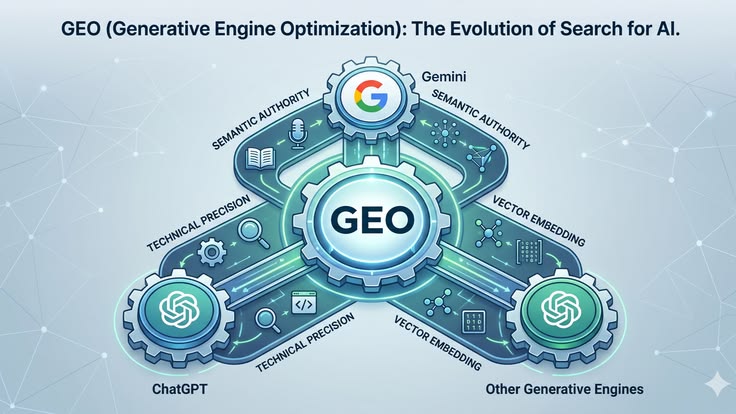
What Is GEO (Generative Engine Optimization)? The Complete Guide to AI-First Search The digital marketing landscape is facing its most disruptive shift since the inception of the commercial internet. For decades, search engine optimization (SEO) has been the undisputed king of organic visibility. Businesses mastered the art of appealing to Google’s PageRank and crawler bots to land a spot on the coveted first page of “10 blue links.” However, user behavior is fundamentally changing. With the massive integration of Artificial Intelligence into our daily search habits—via Google’s AI Overviews, OpenAI’s SearchGPT, and conversational answer engines like Perplexity AI—users no longer want a list of websites to click through. They want direct, synthesized, and immediate answers to complex questions. To survive this transition, brands must pivot from traditional SEO to GEO (Generative Engine Optimization). GEO is the strategic practice of optimizing digital content so that Large Language Models (LLMs) and generative search systems pick your brand, cite your website, and recommend your products when answering a user’s conversational prompt. 1. How Generative Search Works: Under the Hood To optimize for an AI engine, you must understand how it retrieves information. Traditional engines map keywords to a massive database index. Generative engines use an architecture called Retrieval-Augmented Generation (RAG). [ User Complex Prompt ] │ ▼ [ RAG Search Layer ] ──> Scrapes & Aggregates Authoritative Web Sources │ ▼ [ LLM Context Window ] ──> Synthesizes & Formulates Cohesive Response │ ▼ [ Output: Conversational Answer + In-Text Citations ] When a user submits a complex prompt, the AI search engine doesn’t just guess an answer. It uses a RAG system to perform a lightning-fast web search for high-quality, relevant articles. It pulls the text from those top-performing pages and feeds them into the LLM’s context window. The LLM reads that aggregated data, synthesizes it, and formats a humanlike response, complete with in-text citations linking back to the source material. Your entire goal with GEO is to ensure your content is structured so perfectly that the RAG system extracts it, and the LLM trusts it enough to cite it. 2. Core Pillars of Generative Engine Optimization (GEO) According to empirical research on AI search visibility, standard keyword stuffing will actively hurt your performance in generative results. Instead, AI engines favor specific content characteristics: A. Authoritative and Statistical Inclusion LLMs are designed to minimize hallucinations (making things up). Because of this, their retrieval layers actively hunt for concrete facts, verified statistics, and primary research data. The Blueprint: Instead of writing vague statements like “Many companies use remote work software,” write with precision: “According to a 2026 Stanford study, 42% of the US labor force now works from home full-time.” B. Structural Fluency & Information Density AI models read text exponentially faster when it is organized logically. Messy walls of text make it difficult for the retrieval system to pull key facts cleanly. The Blueprint: Use explicit markdown formatting. Break down data into clear comparison tables, use highly descriptive H2 and H3 headings, and present actionable takeaways in bulleted lists. C. Direct Answer Architecture (The TL;DR Block) Generative engines want to answer the user as quickly as possible. If your article hides the main answer at the very bottom of a 2,000-word post, an AI bot will pass it over for a site that delivers immediate value. The Blueprint: Implement a “Direct Answer Block” or a summary box right beneath your main article title. Give the AI the exact definition or solution it needs to scrape instantly, then provide the deep-dive context below. 3. SEO vs. GEO: A Deep Comparison Matrix Feature / Metric Traditional SEO Generative Engine Optimization (GEO) User Search Style Short, fragmented phrases (e.g., “best wireless headphones”) Long, contextual prompts (e.g., “what are the best noise-canceling headphones for a small head on a 6-hour flight?”) Primary Goal Rank #1 in the organic search results list Become the primary cited source or product recommendation inside the AI response Content Focus Target keyword volume, search intent, and comprehensive topic coverage High information density, first-party data, and expert quotes Technical Driver XML sitemaps, clean URLs, and basic meta tags Advanced Schema Markup (Product, FAQ, Organization) and unblocked AI bots Primary Metric Search engine ranking positions (SERP) and raw organic clicks Share of Voice (SoV) in AI answers and referral traffic from AI subdomains 4. How to Optimize Your Website for the Big Three AI Engines Each major player in the AI search race handles data extraction slightly differently. A robust GEO strategy accounts for these unique preferences. 1. Google AI Overviews (Gemini) Google’s AI capabilities are native extensions of its core web index. Leverage EEAT: Experience, Expertise, Authoritativeness, and Trustworthiness are non-negotiable. Ensure your content features clear author biographies, links to verified social profiles, and expert credentials. Keep Core Web Vitals Flawless: If your page takes too long to load or render, Google’s real-time RAG engine will skip past your site to maintain its conversational speed. 2. OpenAI SearchGPT / ChatGPT Search OpenAI heavily weights real-time web discovery alongside its deeply integrated premium publisher partnerships. Digital PR and Third-Party Reviews: SearchGPT often pulls brand recommendations by looking at web sentiment. To show up as a recommended product, ensure your brand has consistent, positive mentions on third-party review platforms (like G2, Trustpilot, or industry forums). Verify Robot Permissions: Check your robots.txt file and make sure you haven’t blocked search crawlers like OAI-SearchBot. 3. Perplexity AI Perplexity operates as an aggressive real-time citation machine, aiming to act as the internet’s definitive bibliography. Be the Original Source: Perplexity prioritizes primary data over secondary aggregators. Focus on publishing original research, proprietary data sets, or case studies. Participate in Community Hubs: Perplexity frequently looks at Reddit and niche forums to gather real-world human consensus. Maintaining an active brand presence on these channels can pull your business directly into Perplexity’s citation loop. 5. Critical Mistakes to Avoid Relying on Generic AI Content Swarms: Mass-producing basic AI-generated text to build a massive blog footprint backfires in GEO. If your

Uncategorized

SEO + AI Search Blogs

SEO + AI Search Blogs: Navigating the Era of Generative Optimization The traditional search engine result page (SERP) is undergoing its most radical transformation since the invention of the hyperlink. For over two decades, search engine optimization (SEO) followed a familiar script: match user search intent, optimize keywords, build authoritative backlinks, and secure a blue link on the first page of Google. Today, that model is colliding with Large Language Models (LLMs) and conversational search engines. With the rise of Google’s Search Generative Experience (SGE) / AI Overviews, OpenAI’s SearchGPT, and Perplexity AI, user behavior is fundamentally shifting from searching for links to asking for direct answers. To survive and thrive in this new landscape, digital marketers, content creators, and businesses must evolve from traditional SEO to GEO (Generative Engine Optimization). This exhaustive, 3,000+ word manual provides the ultimate playbook for optimizing your website for both traditional search crawlers and AI-driven answer engines. 1. The Paradigm Shift: Traditional SEO vs. AI Search (GEO) To optimize for the future, you must first understand how AI search engines process information differently compared to classic index-based search algorithms. Traditional SEO Pipeline: [Crawler / Bot] ──> [Index Database] ──> [Algorithm Ranking] ──> [List of 10 Blue Links] AI Search / GEO Pipeline: [User Prompt] ──> [LLM Retrieval] ──> [RAG Context Synthesis] ──> [Conversational Answer + Citations] From Keywords to Contextual Conversational Prompts Traditional SEO relies heavily on specific search phrases (e.g., “best project management software”). AI search engines, however, excel at understanding long-tail, highly conversational, and multi-intent prompts (e.g., “I run a small remote marketing agency with 5 people and need a free project management tool that integrates with Slack and handles time tracking—what are my best options?”). AI search engines don’t just look for exact keyword matches; they use Retrieval-Augmented Generation (RAG) to scan the web, pull context from multiple authoritative sources, and synthesize a single, cohesive answer tailored precisely to that highly specific user. The New Currency: In-Text Citations and Recommendations In an AI overview, getting clicked requires your brand or content to be explicitly cited as a supporting source within the AI-generated response. If an LLM uses your data to formulate its answer but doesn’t prominently feature your link as a citation or a recommended resource block, your organic traffic drops significantly. GEO is the art of formatting your content so AI engines choose your site to back up their claims. 2. The Core Mechanics of Generative Engine Optimization (GEO) According to early research into AI search behavior, standard SEO tactics alone aren’t enough to secure visibility in AI-generated answers. Content needs to be structured in a way that aligns with how LLMs extract and synthesize facts. Here are the core optimization levers for GEO: A. Authoritative and Statistics-Backed Content AI models value highly credible data points. Content that includes verified statistics, quotes from industry experts, and primary research data has a significantly higher chance of being extracted as an authoritative source block by an AI engine. Actionable Tactic: Don’t just make a claim. Back it up explicitly: “According to a 2026 industry report by McKinsey, 73% of enterprises have fully integrated AI into their content supply chains.” B. Structural Fluency and Scannability LLMs read text to extract core facts. If your content is buried inside overly complex language, dense prose, or unformatted text blocks, the model’s retrieval system may skip it in favor of cleaner sources. Actionable Tactic: Utilize explicit markdown tables, highly descriptive subheadings (##, ###), and cleanly organized bulleted lists. AI systems love structured data because it makes pattern-matching effortless during the retrieval phase. C. Direct Answer Optimization (The “TL;DR” Framework) AI search engines are fundamentally built to give users immediate answers. If your article takes five paragraphs of introductory fluff to get to the point, it will fail in AI search. Actionable Tactic: Implement an upfront, direct answer summary block at the absolute top of your key landing pages and informational guides. Give the AI the exact, clear answer it needs to scrape immediately, then expand on the details further down the page. 3. Step-by-Step Blueprint to Optimize for Leading AI Platforms Different AI engines prioritize different signals. To ensure comprehensive coverage, you must tailor your digital footprint to appease the distinct algorithms driving the industry leaders. ┌────────────────────────────────────────────────────────┐ │ The Trinity of AI Search │ ├───────────────────────────┬────────────────────────────┤ │ 1. Google AI Overviews │ 2. OpenAI SearchGPT │ │ (EEAT & Core Web Index)│ (Virality & Partnerships│ ├───────────────────────────┼────────────────────────────┤ │ 3. Perplexity AI │ │ │ (Real-time Aggregation)│ │ └───────────────────────────┴────────────────────────────┘ 1. Optimizing for Google AI Overviews (formerly SGE) Google’s AI solutions are built directly on top of its massive, existing core web index. Therefore, solid traditional technical SEO remains the baseline requirement. Prioritize EEAT: Experience, Expertise, Authoritativeness, and Trustworthiness are paramount. Ensure your articles have clear author bios, links to professional portfolios, and verifiable credentials. Keep Core Web Vitals Immaculate: If your page takes too long to load or render, Google’s real-time retrieval system may drop it from the pool of potential live AI sources. Schema Markup Deployment: Implement advanced Schema structured data (e.g., Article, Product, FAQ, and Organization schemas) to give Google’s Gemini models perfect semantic understanding of your content’s underlying meaning. 2. Optimizing for OpenAI SearchGPT / ChatGPT Search OpenAI’s search model leans heavily on direct partnerships with major media organizations, real-time web crawling, and conversational synthesis. Inbound Brand Mentions: SearchGPT frequently synthesizes brand recommendations based on user sentiment across the web. To appear in product roundups, your brand needs positive mentions on third-party review sites, forums, and digital publications. Clear OAI-Bot Permissions: Ensure your robots.txt file permits OAI-SearchBot to crawl your site. If you block OpenAI’s dedicated search crawler, your site will never appear in ChatGPT’s interactive search interface. 3. Optimizing for Perplexity AI Perplexity functions as a real-time answer engine that aggressively crawls the web to build direct, comprehensive bibliographies for its users. Target Niche Forums and Digital PR: Perplexity frequently pulls perspectives from platforms like Reddit, Quora, and niche industry forums to provide diverse

cybersecurity, Digital Transformation, Software development, Technology & Innovation

Serverless Architecture Explained

Serverless Architecture Explained: The Ultimate Guide to Event-Driven, No-Ops Development For decades, deploying a software application followed a predictable, rigid formula: lease a physical server, configure the operating system, set up web servers, and pray your traffic estimations were accurate. If you undershot, your site crashed under unexpected load. If you overshot, you wasted thousands of dollars maintaining idle computing power. The cloud era mitigated this via virtualization and auto-scaling, but developers still had to manage, patch, secure, and scale those virtual machines. Serverless architecture completely shatters this paradigm. Despite the name, “serverless” doesn’t mean servers are no longer involved; it means developers are completely abstracted from them. The cloud vendor handles provisioning, scaling, maintaining, and upgrading the infrastructure automatically. You write the code; the cloud takes care of the rest. This 3,000+ word deep-dive will break down the mechanics, core components, operational benefits, patterns, pitfalls, and future outlook of serverless development to give you a definitive implementation blueprint. 1. Defining Serverless Architecture: The Core Pillars To understand serverless, we must look past the marketing hype and focus on its four foundational engineering characteristics: ┌────────────────────────────────────────────────────────┐ │ The 4 Pillars of Serverless │ ├───────────────────────────┬────────────────────────────┤ │ 1. Zero Infrastructure │ 2. Automated Hyper-Scaling │ │ Management │ (Scale-to-Zero) │ ├───────────────────────────┼────────────────────────────┤ │ 3. Pay-per-Use Billing │ 4. Built-in Fault │ │ (Down to the Millisecond)│ Tolerance │ └───────────────────────────┴────────────────────────────┘ Zero Infrastructure Management: Developers do not provision, patch, manage, or maintain underlying operating systems, runtimes, or container hardware. Automated Hyper-Scaling: The infrastructure automatically scales up or down in precise correlation to incoming traffic. If you receive one request, one instance runs. If you receive 100,000 simultaneous requests, the vendor instantly provisions thousands of execution environments. Scale-to-Zero (Pay-per-Use): When your application is idle, zero computing resources are active. You pay absolutely nothing for idle time. Billing is calculated down to the millisecond of actual execution time and memory consumed. Built-in Fault Tolerance: Serverless services inherently span multiple availability zones and regions by default, providing high availability without manual setup. 2. FaaS vs. BaaS: The Two Sides of Serverless Serverless architecture is broadly divided into two complementary conceptual spaces: Function-as-a-Service (FaaS) and Backend-as-a-Service (BaaS). Function-as-a-Service (FaaS) FaaS is the computational heartbeat of serverless. Instead of deploying a monolithic web application that sits running continuously, developers break application logic down into small, ephemeral, single-purpose functions. These functions are completely stateless and are triggered exclusively by specific system events (e.g., an HTTP request, a new file upload, or a database modification). Key Characteristics: Short lifespans (typically timed out after 15 minutes), stateless execution, and rapid startup times. Examples: AWS Lambda, Google Cloud Functions, Azure Functions. Backend-as-a-Service (BaaS) A serverless ecosystem cannot survive on stateless computation alone; it requires supporting cloud services that follow the exact same serverless scaling and billing principles. This is BaaS. Instead of deploying and managing a database cluster (like PostgreSQL) or a message broker (like RabbitMQ), developers leverage fully managed, API-driven cloud services. Databases: Serverless NoSQL or SQL options (e.g., Amazon DynamoDB, Google Cloud Firestore, Aurora Serverless). Authentication: Managed identity solutions (e.g., AWS Cognito, Auth0). Storage: Scalable object stores (e.g., Amazon S3, Google Cloud Storage). 3. The Lifecycle of an Event-Driven Serverless Function Unlike traditional server environments where an application loops continuously listening for requests on a port, serverless runs on a strictly event-driven architecture. ┌───────────┐ ┌───────────────┐ ┌───────────────────────┐ ┌────────────┐ │ Event │ ───> │ API Gateway / │ ───> │ Function Execution │ ───> │ BaaS / DB │ │ Trigger │ │ Event Router │ │ (Ephemeral Container) │ │ Write │ └───────────┘ └───────────────┘ └───────────────────────┘ └────────────┘ The Request Execution Chain: The Trigger: An external event occurs. For example, a user uploads a high-resolution image to a cloud storage bucket. The Routing: The cloud provider detects the bucket state change and maps it to a designated FaaS function handler. Container Provisioning: If no active container instance is waiting (a “cold start”), the provider initializes an isolated micro-container environment, loads your code package, and spins up the language runtime. Execution: The function executes its explicit single purpose (e.g., reads the image, resizes it into a thumbnail, and writes it back to another bucket). Teardown or Freeze: Once the function returns a response, the container is frozen for a brief period to handle immediate subsequent requests. If no other requests arrive, it is destroyed. 4. Comprehensive Architecture Comparison Architectural Metric Traditional Tiered (IaaS/PaaS) Serverless Architecture (FaaS/BaaS) Scaling Capacity Manual or rule-based auto-scaling (e.g., Scale when CPU > 70%). Takes minutes. Instantaneous, micro-second scaling matching request concurrency perfectly. Cost Efficiency Paid hourly/monthly per instance, regardless of actual load or idle status. Paid strictly per execution count, memory allocation, and run duration. Maintenance Overheads OS updates, security vulnerability patching, and runtime updates required. Vendor manages full OS, base images, software environments, and updates. State Management State can be easily held locally in server memory or local disk file sessions. Inherently stateless. State must be externalized to cache layers or databases. Max Execution Limits Indefinite. Long-running processes, cron jobs, and background workers run forever. Strict runtime limits (e.g., 15 minutes max per invocation on AWS Lambda). 5. Architectural Blueprints & Design Patterns Serverless shines brightest when combined with modern design patterns optimized for decentralized systems. Let’s look at three standard operational patterns. Pattern 1: The Modern REST API / Microservice In a serverless web API, traditional frameworks like Express.js or Spring Boot are replaced by decoupled event-handlers connected to an intelligent proxy gateway. [ Client Request ] ──> [ API Gateway ] ──> [ AWS Lambda ] ──> [ DynamoDB ] API Gateway: Acts as the public-facing router, handling SSL termination, rate limiting, CORS configurations, and routing public endpoints to explicit functions. Lambda Functions: Each endpoint route (e.g., POST /orders, GET /orders/{id}) executes an independent function, isolating failures completely. Pattern 2: Asynchronous Data Processing Pipelines Processing intensive operations asynchronously keeps frontend services responsive and prevents system bottlenecks. [ Large File Upload ] ──> [ S3 Bucket ] ──> [ S3 Event Trigger ] ──> [ Lambda Processor ] Execution:

cybersecurity, DEVOPs

DevSecOps Best Practices

DevSecOps Best Practices: The Ultimate Blueprint for Secure, High-Velocity Software Delivery In the traditional software development lifecycle, security was often treated as the “final gate.” Developers would spend months building a product, operations would prepare the infrastructure, and just before launch, the security team would sweep in to perform a vulnerability audit. The result? A massive bottleneck. Security teams were viewed as the “Department of No,” pushing deadlines back by weeks or months to fix critical flaws discovered at the eleventh hour. In today’s hyper-accelerated digital landscape—where organizations deploy updates multiple times a day—this siloed approach is no longer sustainable. Enter DevSecOps. By embedding security directly into every stage of the continuous integration and continuous delivery (CI/CD) pipeline, DevSecOps ensures that software is not just fast, but inherently secure from the very first line of code. This comprehensive guide breaks down the core pillars, essential phases, actionable best practices, and real-world implementation strategies required to build a mature, human-centric DevSecOps culture. 1. Demystifying DevSecOps: Shift-Left and Shift-Right To successfully implement DevSecOps, it is critical to understand its two defining operational philosophies: Shifting Left and Shifting Right. [ Plan ] ──> [ Code ] ──> [ Build ] ──> [ Test ] ──> [ Deploy ] ──> [ Monitor ] │ │ │ │ │ │ └────────────┴────────────┴─────────────┴────────────┴───────────────┴──────── Security Focus Shifting Left: Proactive Security Shifting left means moving security practices earlier in the development lifecycle. Instead of waiting for a compiled build or a staged environment to run security scans, shift-left introduces security during the Planning, Coding, and Building phases. Why it matters: Fixing a software vulnerability during the design or coding phase can be up to 60 times cheaper than fixing it after it has been deployed to production. Core activities: Threat modeling, secure code reviews, IDE-integrated linting, and Static Application Security Testing (STAST). Shifting Right: Continuous Resilience While shifting left prevents bugs from reaching production, shifting right focuses on security during the Deployment, Operation, and Monitoring phases. It acknowledges that no system is entirely impenetrable and that runtime threats require continuous vigilance. Why it matters: Real-world exploits, zero-day vulnerabilities, and configuration drifts only happen in live environments. Shifting right ensures you spot and contain breaches instantly. Core activities: Runtime Application Self-Protection (RASP), penetration testing, chaos engineering, and continuous compliance monitoring. 2. The Cultural Pillar: Fostering a Shared-Responsibility Mindset The greatest misconception about DevSecOps is that it is purely a tooling problem. You can purchase the most expensive scanning software on the market, but if your organizational culture remains siloed, your DevSecOps initiative will fail. Breaking Down the Silos Historically, developers were incentivized purely by speed and functionality, while security teams were incentivized by risk mitigation. This created conflicting goals. DevSecOps requires a cultural alignment where security becomes a shared responsibility. Developers must accept ownership of the code’s security posture. Security Teams must transition from “gatekeepers” to “enablers,” providing the tools, automation, and guidance that developers need to work securely without losing velocity. Implementing a Security Champions Program A highly effective way to bridge the gap between engineering and security is by appointing Security Champions. What they are: Security Champions are regular software engineers, QA testers, or product managers who possess a keen interest in security. They remain embedded within their respective product teams. Their role: They act as the primary point of contact for security matters, help scale security knowledge across the engineering department, and ensure that security considerations are brought up during initial sprint planning sessions. 3. The DevSecOps Lifecycle: Step-by-Step Integration Integrating security into the CI/CD workflow requires tailored security gates at every single phase of the delivery pipeline. Let’s look at how to embed security seamlessly from planning to production. Phase 1: Plan (Threat Modeling & Risk Assessment) Security starts before a single line of code is written. During the planning phase, product teams map out features alongside potential attack vectors. Threat Modeling: Use frameworks like STRIDE (Spoofing, Tampering, Repudiation, Information Disclosure, Denial of Service, and Elevation of Privilege) to visually map out application architecture and discover architectural flaws early. Defining Security Requirements: Establish clear cryptographic standards, data classification rules, and compliance mandates (e.g., GDPR, HIPAA, PCI-DSS) during user story creation. Phase 2: Code (Secure Coding & IDE Assistance) When developers begin writing code, immediate feedback loops prevent vulnerable patterns from ever leaving their local workstations. Pre-Commit Hooks: Use lightweight scripts (like Git hooks) to prevent developers from accidentally committing sensitive data, such as plain-text API keys, AWS tokens, or private certificates, to version control. IDE Plugins: Equip developers with tools like SonarLint or Snyk extensions directly within VS Code or IntelliJ. These operate like spell-checkers for security, highlighting risky functions or outdated packages in real time. Phase 3: Build (Automated Code & Dependency Analysis) Once code is pushed to a shared repository, automated CI servers (like Jenkins, GitHub Actions, or GitLab CI) take over to build the application and trigger deeper security analyses. Static Application Security Testing (SAST): SAST tools analyze the source code or compiled binaries without executing the program. They look for classic vulnerabilities like SQL injection, Cross-Site Scripting (XSS), and buffer overflows. Software Composition Analysis (SCA): Modern applications are heavily built on open-source libraries. SCA tools scan your package.json, pom.xml, or requirements.txt files against databases of known public vulnerabilities (CVEs) to ensure you aren’t inheriting compromised third-party code. Phase 4: Test (Dynamic Evaluation & Testing) In the testing phase, the application is deployed into a staging or QA environment, allowing security tools to interact with it dynamically. Dynamic Application Security Testing (DAST): Unlike SAST, DAST tests the application from the outside-in by simulating a malicious hacker. It probes active endpoints, forms, and APIs to find vulnerabilities that only manifest when the application is running (e.g., authentication flaws or session management issues). Interactive Application Security Testing (IAST): IAST combines the benefits of both SAST and DAST. By deploying an agent within the application runtime, it monitors code execution while simultaneously running functional automated testing suites, yielding incredibly accurate results with fewer false positives.

DEVOPs, Software development

Infrastructure as Code (IaC) Guide

The Infrastructure as Code (IaC) Guide: Automating Your Cloud Ecosystem There is an old, painful way of managing IT infrastructure that many sysadmins still remember with a shudder. If you needed a new staging environment, you had to log into a cloud console, click dozens of buttons, configure virtual networks manually, spin up virtual machines, and manually run terminal commands to install packages. If you needed five identical environments for different engineering teams, you had to repeat that exact manual process five times. And inevitably, a human typo would slip in, causing a subtle, hidden variance between environments that took days of debugging to find. This nightmare is known as Configuration Drift. Infrastructure as Code (IaC) fundamentally changes the game. It is the practice of managing and provisioning your entire cloud infrastructure—servers, load balancers, databases, networks, and firewalls—using machine-readable definition files rather than manual interactive configuration tools. In short: You treat your hardware exactly like your software code. You write your infrastructure in descriptive configuration files, store them in Git version control, run automated testing against them, and deploy them through continuous delivery pipelines. Whether you are looking to migrate your first app to the cloud or scaling a multi-cloud enterprise architecture, this guide breaks down everything you need to master Infrastructure as Code. 1. Declarative vs. Imperative IaC: Choosing Your Approach When diving into the IaC landscape, you will immediately encounter two competing structural philosophies: Declarative and Imperative. Understanding the difference is crucial for designing a clean automation framework. +—————————————————————–+ | DECLARATIVE APPROACH (The Destination) | | “I want an environment with 3 web servers and 1 load balancer.” | | -> Tool figures out the steps automatically. | +—————————————————————–+ VS +—————————————————————–+ | IMPERATIVE APPROACH (The Journey) | | “Step 1: Create a VPC. Step 2: Spin up VM 1. Step 3: Run script.”| | -> Tool executes explicit, sequential commands. | +—————————————————————–+ The Declarative Approach (The Industry Standard) In a declarative model, you define the desired end-state of your infrastructure. You write a configuration file specifying exactly what assets you want to exist, and the IaC tool handles the rest. It calculates the current state of your cloud, compares it to your file, and automatically applies only the changes necessary to reach that target end-state. Analogy: Ordering a pizza. You tell the restaurant what toppings you want, and they deliver the final product. Primary Tools: Terraform, AWS CloudFormation, OpenToFu. The Imperative Approach In an imperative model, you define the explicit, sequential steps required to provision the infrastructure. You write scripts detailing exactly how to build the environment step-by-step. Analogy: Baking a pizza from scratch using a detailed, rigid recipe. If you mess up step three, the whole process breaks down. Primary Tools: Ansible, Chef, Puppet, or custom Bash/Python cloud-CLI scripts. For modern cloud provisioning, the Declarative approach has decisively won the industry standard because it is inherently idempotent—meaning you can run the exact same script a thousand times safely, and it will only modify infrastructure if the desired state deviates from reality. 2. Core Pillars of a Mature IaC Framework To implement Infrastructure as Code successfully, your architecture must rest upon four foundational DevOps pillars. 1. Immutability Over Mutation In a traditional Mutable Infrastructure model, servers are updated live in production. If a software patch is released, you log into the running machine and install it. Over time, your fleet becomes a collection of unique, snowflake servers, each configured slightly differently. IaC enables Immutable Infrastructure. You never update a live server. If an operating system patch or application update is required, you update your IaC script, destroy the old server instance entirely, and spin up a pristine, brand-new instance from the updated blueprint. This guarantees that your environments remain completely clean and identical at all times. 2. Idempotency An IaC pipeline must be idempotent. This means that executing your configuration code multiple times will yield the exact same result without unintended side effects. If your code declares that you need an Amazon S3 bucket named my-media-vault, running that script twice should verify the bucket exists on the second run, rather than throwing an error or creating a duplicate bucket. 3. Git as the Single Source of Truth (GitOps) Your infrastructure code should live inside your Git repositories right next to your application source code. Want to change a firewall rule? You don’t log into the cloud console. You open a Pull Request (PR) mutating the IaC file. Your peers review the infrastructure change line-by-line via code review. Once approved and merged, an automated CI/CD pipeline executes the change across your live environment. 4. State Management Declarative IaC tools maintain a crucial asset known as a State File. This file acts as a map, tracking the exact relationship between the configuration code you wrote and the actual real-world resources currently running inside your cloud provider (AWS, Azure, Google Cloud). Managing this state file securely in a centralized, encrypted remote storage vault (like an S3 bucket with state locking enabled) prevents multiple engineers from accidentally overwriting or executing conflicting infrastructure updates simultaneously. 3. The Modern IaC Toolchain The automation landscape is rich with specialized tools. High-performing teams typically combine a provisioning tool with a configuration management tool to manage the complete infrastructure lifecycle. [ Provisioning Layer: Terraform ] ──► Spins up physical Networks, Routers, & VMs. │ ▼ [ Configuration Layer: Ansible ] ──► Installs App dependencies, packages, & users. Provisioning Tools (Building the Skeleton) Terraform / OpenToFu: The dominant cloud-agnostic platform. It uses a declarative language called HCL (HashiCorp Configuration Language) to map out complex infrastructure across multiple cloud providers simultaneously. AWS CloudFormation / Azure ARM Templates: Native, proprietary provisioning engines built directly into specific cloud ecosystems. They work exceptionally well within their respective clouds but lock you into that single vendor. Pulumi: A modern alternative that allows you to write declarative infrastructure layouts using real software programming languages like TypeScript, Python, or Go, instead of custom configuration syntaxes. Configuration Management (Fleshing Out the Bones) Ansible: An open-source,

DEVOPs, Software development

How to Deploy Scalable Applications

The Architecture of Scale: A Practical Guide to Deploying Scalable Applications In the life of every successful application, there comes a defining moment: the traffic surge. Whether it’s a sudden viral mention, a massive marketing campaign, or organic user growth, your software is suddenly put to the ultimate test. If your application isn’t built for scale, this moment of triumph quickly turns into a disaster. Servers freeze, databases choke, error rates spike, and users walk away frustrated. Historically, handling more traffic meant buying a bigger, more expensive server—a strategy known as vertical scaling. But a single machine, no matter how powerful, has a hard physical ceiling. Modern scalability is entirely about horizontal scaling: architectures engineered to distribute the workload seamlessly across tens, hundreds, or thousands of smaller, modular machines. Deploying a truly scalable application isn’t just about throwing code onto a cloud provider; it’s a deliberate orchestration of stateless application design, intelligent traffic routing, database optimization, and automated infrastructure management. Let’s break down the blueprint for deploying an application that can effortlessly grow from one hundred users to millions. 1. The Core Pillar: Designing Stateless Applications Before you can scale out your infrastructure across multiple servers, your application code must be structurally ready for it. The absolute golden rule of horizontal scalability is: Make your application services stateless. In a traditional, stateful application setup, user sessions or local files are saved directly onto the specific server’s hard drive or internal memory. If a user logs into Server A, their session data lives exclusively on Server A. If a load balancer accidentally sends their next request to Server B, the application won’t recognize them, forcing them to log in again. Stateful (Anti-Pattern): User Request ──► [ Load Balancer ] ──► [ Server A (Saves Session Locally) ] Next Request ──► [ Load Balancer ] ──► [ Server B (Session Missing! Error ❌) ] Stateless (Scalable Best Practice): User Request ──► [ Load Balancer ] ──► [ Server A ] ──► [ Shared Session Cache (Redis) ] Next Request ──► [ Load Balancer ] ──► [ Server B ] ──► [ Shared Session Cache (Redis) ✔ ] Decoupling the State To fix this bottleneck, extract all dynamic data out of the application tier and push it to dedicated external systems: User Sessions: Store them in a high-speed, in-memory database like Redis or utilize stateless JSON Web Tokens (JWT) decrypted on the fly by the application. File Uploads: Never save user avatars or uploaded documents to a server’s local disk. Use a scalable, distributed object storage service like Amazon S3 or Google Cloud Storage. Background Tasks: Move heavy processing jobs (like rendering video or generating PDF reports) out of the main web server loop and push them into an external message queue like RabbitMQ or Apache Kafka to be handled by background workers. When your application tier is completely stateless, individual servers become entirely interchangeable. You can destroy fifty servers or spin up a hundred new ones instantly without disrupting a single user session. 2. Traffic Distribution: Load Balancing and CDNs When you deploy multiple instances of your application, you need an intelligent traffic cop to distribute incoming user requests evenly across your infrastructure. The Role of the Load Balancer A load balancer sits directly between your users and your application fleet. It continuously listens for incoming web traffic and forwards requests to the healthiest, least-burdened application server using routing algorithms like Round Robin or Least Connections. Modern cloud load balancers (like AWS ALB or NGINX) also handle Health Checking. They continuously ping your individual application instances; if a specific server crashes or slows down, the load balancer instantly stops routing traffic to it, keeping your user experience completely seamless. Offloading Traffic via Content Delivery Networks (CDNs) The absolute cheapest, most efficient way to scale an application is to stop traffic from ever hitting your web servers in the first place. A CDN (like Cloudflare, Fastly, or CloudFront) is a global network of edge servers scattered across the world. When a user requests your website, the CDN intercepts the request and serves static assets—such as HTML files, CSS stylesheets, JavaScript files, and images—directly from the data center physically closest to that user. [ Global User Base ] ──► [ CDN Edge Servers ] ──► (Serves 80% Static Content Instantly) │ (Only 20% Dynamic API Calls) │ ▼ [ Load Balancer ] │ [ Stateless App Fleet ] By caching your static frontend assets at the edge, you can deflect up to 80% of incoming web traffic away from your core application servers, leaving them free to process critical, dynamic API data. 3. Containerization and Orchestration (Docker & Kubernetes) Deploying a scalable system manually across dozens of individual servers is an operational nightmare. To make scale manageable, modern deployment architectures rely heavily on containerization and orchestration toolchains. Packaging with Docker Docker packages your application code and its exact environment configuration into a lightweight, immutable container image. This guarantees that your application runs identically whether it’s on a developer’s laptop, a staging platform, or a production server cluster, eliminating the risk of environment-specific bugs during scale-up events. Orchestrating with Kubernetes Once your application is containerized, you use an orchestration engine like Kubernetes (K8s) to manage the deployment at scale. Instead of manually launching individual containers, you define your desired operational state in configuration files (e.g., “I want to ensure there are always at least five duplicates of my backend API container running”). Kubernetes continually monitors your cloud nodes; if a node goes offline, it automatically schedules replacement containers onto other healthy servers to maintain your scale profile. 4. Breaking the Ultimate Bottleneck: Database Scalability You can scale your web servers and containers infinitely, but eventually, they all must talk to the database. In almost every major application deployment, the database becomes the ultimate architectural bottleneck. Traditional relational databases (like PostgreSQL or MySQL) are structurally designed to scale vertically. When thousands of application containers begin opening simultaneous connections to a single database server, it will

Digital Transformation, Software development, Technology

Cloud Cost Optimization Strategies

Cloud Cost Optimization Strategies: The Ultimate Guide to Reclaiming Your Cloud Spend There is a running joke in the engineering world: the fastest way to burn through a million dollars isn’t a luxury yacht or a bad investment—it’s leaving an unmanaged AWS or Azure environment running over the weekend. In the early days of cloud migration, the narrative was simple: Move to the cloud, save money. But as organizations scale, reality sets in. Cloud bills grow organically, mysteriously, and rapidly. Suddenly, finance teams are asking why the monthly infrastructure bill looks like a phone number, and engineering leads are scrambling to figure out which microservice is draining the budget. The truth is, the cloud makes provisioning resources so effortless that it invites waste. Left unchecked, you wind up paying for oversized servers, forgotten storage volumes, and idle staging environments. Cloud cost optimization isn’t about ruthlessly cutting services until your application breaks; it’s about efficiency. It’s the art of matching your actual infrastructure needs with the most cost-effective cloud resources available. This comprehensive guide breaks down the definitive strategies to help you eliminate cloud waste, engineer predictable budgets, and optimize your architecture without sacrificing performance. 1. Where Does the Money Go? Mapping Cloud Waste To fix a massive cloud bill, you first need to know what you are actually paying for. Cloud waste typically hides in plain sight across a few common areas: +—————————————————————+ | THE 4 DEADLY CLOUD WASTES | +—————————————————————+ | 1. Zombie Resources ──► Idle, orphaned, or unattached disks | | 2. Over-Provisioning ──► Paying for 8 Cores, using only 5% | | 3. Misconfigured Tiers──► Storing backup logs on Premium SSD | | 4. Rogue Environments ──► Staging clusters running 24/7/365 | +—————————————————————+ Before changing a single line of infrastructure code, set up a strict tagging policy. Resource Tagging is your single source of truth. Every single virtual machine, database, and storage bucket should be tagged by: Environment (Production, Staging, Dev) Owner/Team (Frontend, Data Science, Billing) Cost Center (Project Alpha, Core Product) Without proper tags, your cloud bill is just a wall of numbers. With them, you can pinpoint exactly which team or project is driving up costs. 2. Strategy 1: Hunt Down Zombie Resources The easiest way to drop your cloud bill immediately is to stop paying for things you aren’t using. These are known as Zombie Resources. Unattached Block Storage (EBS Volumes / Managed Disks) When an engineer terminates a virtual machine (like an AWS EC2 instance), the cloud provider doesn’t always automatically delete the virtual hard drive (EBS volume) attached to it. Over months, your account accumulates hundreds of “available” but unattached storage volumes. They do absolutely nothing, yet you are billed for every gigabyte. The Strategy: Run automated scripts or use cloud native tools to scan for disks with an available status. Snapshot them for safety if necessary, and then ruthlessly delete them. Orphaned Load Balancers and Idle Elastic IPs Engineers spin up load balancers for testing and then delete the backend servers, leaving the load balancer active. Similarly, static public IP addresses are free while attached to a running server, but cloud providers charge an hourly penalty rate if they sit unattached to prevent IP hoarding. The Strategy: Set up automated alerts to flag any load balancer receiving zero traffic over a 7-day period. 3. Strategy 2: Right-Sizing (Stop Buying More Than You Need) Right-sizing is the process of matching instance sizes and types to your actual workload performance requirements. A common developer habit is to provision a massive server instance because “we might get a traffic spike” or “I want to ensure it runs fast.” If you check your cloud metrics dashboard, you’ll frequently find servers running at an average of 5% to 10% CPU utilization. You are essentially paying for 90% headroom that you never touch. Traditional Over-Provisioned Model: [ Server Capacity: 16 vCPU / 64GB RAM (Cost: $$$$) ] └── [ Actual Application Load: ■■ (Using 5%) ] <– Massive Waste! Optimized Right-Sized Model: [ Server Capacity: 4 vCPU / 16GB RAM (Cost: $) ] └── [ Actual Application Load: ■■■■■■■ (Using 50%) ] <– Highly Efficient! How to Right-Size Safely Analyze Historical Metrics: Look at CPU, memory, Network I/O, and disk performance over a 30-day window. Downsize Downward: If CPU usage never peaks above 20%, drop the instance down one tier (e.g., from an m5.2xlarge to an m5.xlarge). This instantly cuts the cost of that resource by 50%. Change Instance Families: Cloud providers regularly release new generations of hardware (e.g., moving from AWS m5 instances to m6g Graviton instances). Newer generations are almost always cheaper and offer better performance per watt. 4. Strategy 3: Implement Automated Scheduling for Non-Prod Environments Your production environment needs to be available 24 hours a day, 7 days a week, 365 days a year. But your development, testing, and staging environments absolutely do not. If your developers work from 9 AM to 6 PM, Monday through Friday, your non-production environments are sitting completely idle for roughly 70% of the week (including nights and weekends). Leaving them running is pure waste. [ Mon – Fri: 9 AM – 6 PM ] ──► Environments ACTIVE (Engineers Working) [ Nights & Weekends ] ──► Automated Script SHUTS DOWN Infrastructure (Instantly saves ~70% on non-prod compute!) Put the Cloud to Sleep Implement automated scheduling tools (like AWS Instance Scheduler or custom cron jobs via Lambda functions) to automatically stop EC2 instances, RDS databases, and container clusters at 7:00 PM every evening and turn them back on at 7:00 AM every morning. Even better, configure them to stay offline entirely on Saturdays and Sundays. 5. Strategy 4: Commit to Committed Use Discounts (RI vs. Savings Plans) If you know you have baseline infrastructure that will be running continuously for the next year or two, paying the standard “On-Demand” hourly rate is financial malpractice. Cloud providers offer massive discounts (up to 72%) if you commit to a consistent amount of usage over a 1-year or 3-year term. Reserved

DEVOPs, Digital Transformation, Software development

Docker vs Kubernetes

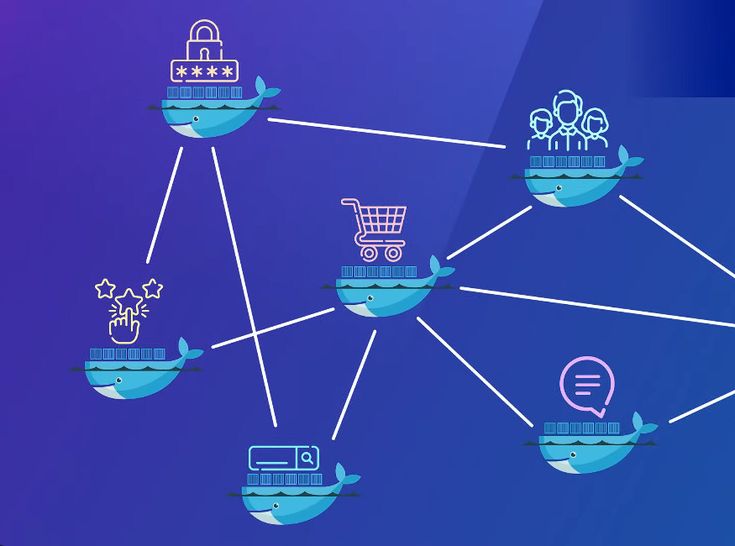
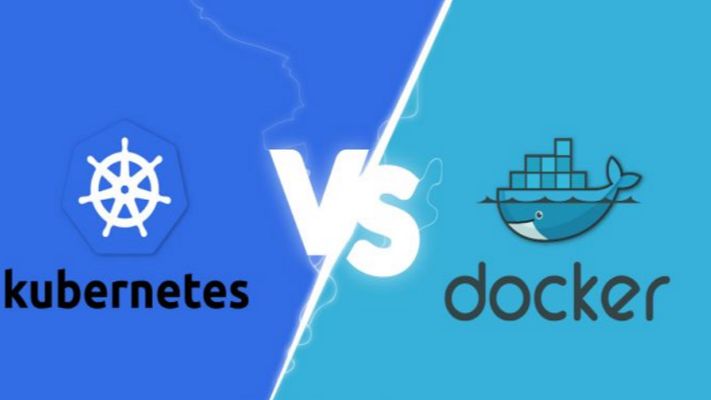
Docker vs Kubernetes: The Ultimate Guide to Containerization and Orchestration If you’ve spent any time around modern software development, you’ve undoubtedly heard the names Docker and Kubernetes thrown around—often in the exact same sentence. For newcomers and seasoned developers alike, this pairing creates an immediate cloud of confusion. You see debates online framed as a heavyweight boxing match: Docker vs. Kubernetes. Which one should you choose? Which one is better? But here is the industry secret that clears up the confusion right away: They are not rivals. Comparing Docker to Kubernetes is like comparing an individual engine to an entire commercial airline fleet. They operate at completely different layers of the software delivery stack. In fact, in the vast majority of enterprise enterprise-grade environments, they aren’t competing at all—they are working together on the exact same team. Whether you are looking to modernise your application architecture, scale your cloud infrastructure, or simply ace your next engineering interview, this comprehensive guide will break down the real differences, use cases, and mechanics of Docker and Kubernetes in a human, practical way. 1. The Core Concepts: Understanding Containers To understand the relationship between Docker and Kubernetes, we first have to understand the fundamental problem they were both built to solve: Environment Consistency. Every developer has experienced the dreaded “It works on my machine” dilemma. Code runs beautifully on a developer’s high-spec laptop but completely crashes when deployed to a staging server or production cloud environment. This happens because of micro-variations in operating systems, missing background libraries, conflicting framework versions, or hidden environment variables. What is a Container? A container solves this by packaging your application’s source code together with the exact runtime, system tools, libraries, and configurations it needs to execute. Unlike a traditional Virtual Machine (VM), which requires an entire heavy guest operating system to run, containers share the host machine’s underlying OS kernel. This makes them incredibly lightweight, lightning-fast to start (seconds instead of minutes), and highly resource-efficient. +—————————–+ +—————————–+ | VIRTUAL MACHINES | | CONTAINERS | | +———–+ +———–+ | | +———–+ +———–+ | | | App v1 | | App v2 | | | | App v1 | | App v2 | | | +———–+ +———–+ | | +———–+ +———–+ | | | Guest OS | | Guest OS | | | | Bin/Libs | | Bin/Libs | | | +———–+ +———–+ | | +———–+ +———–+ | | | Hypervisor/Host OS | | | | Container Engine (Docker) | | | +————————-+ | | +————————-+ | | | Physical Hardware | | | | Host OS / Hardware | | +—————————–+ +—————————–+ 2. What is Docker? (The Container Creator) Docker is an open-source platform designed to create, deploy, and run applications inside containers. It popularised the container revolution by making the underlying, complex Linux isolation technologies incredibly user-friendly. If you want to containerise an application using Docker, your workflow follows a clean three-step process: The Dockerfile: You write a plain-text configuration file that acts as a recipe. It specifies the base operating system, the dependencies to install, the environment variables to set, and the command to run your code. The Docker Image: Docker reads your Dockerfile and compiles it into an immutable, static blueprint called an Image. This image can be shared easily via registries like Docker Hub. The Docker Container: When you tell Docker to run that image, it spins up a live, isolated, executable instance. This is your running container. Where Docker Excels Docker is absolutely brilliant for single-node management. It gives an individual developer the power to spin up complex development environments—like a Node.js backend, a React frontend, and a PostgreSQL database—locally on their machine in a matter of seconds using a tool called Docker Compose. 3. What is Kubernetes? (The Fleet Commander) Now, let’s scale up. Imagine your business grows rapidly. Your simple application is no longer running as a single container on a laptop; it is now running across hundreds of cloud servers to handle millions of concurrent user requests. Suddenly, managing containers manually via Docker becomes a logistical nightmare: What happens if a server crashes in the middle of the night and kills fifty of your containers? How do you evenly distribute incoming web traffic across hundreds of duplicate containers? How do you upgrade your application to Version 2 without taking down the website? Docker alone cannot solve these problems because it only cares about managing individual containers on a single machine. It doesn’t see the bigger infrastructure picture. This is where Kubernetes (often abbreviated as K8s, representing the eight letters between ‘K’ and ‘s’) comes into play. Developed originally by Google, Kubernetes is a container orchestration engine. It doesn’t create containers; instead, it hooks into container runtimes to automate the deployment, scaling, management, and networking of containerized applications across a massive cluster of machines. [ Incoming Web Traffic ] │ ▼ ┌────────────────────────────────────────────────────────┐ │ KUBERNETES CONTROL PLANE │ │ (Monitors traffic, server health, and load balancing) │ └──────────┬───────────────────┬───────────────────┬─────┘ │ │ │ ▼ ▼ ▼ ┌───────────────┐ ┌───────────────┐ ┌───────────────┐ │ Cloud Node 1 │ │ Cloud Node 2 │ │ Cloud Node 3 │ │ [Docker] │ │ [Docker] │ │ [Docker] │ │ [Container] │ │ [Container] │ │ [Container] │ └───────────────┘ └───────────────┘ └───────────────┘ The Superpowers of Kubernetes Self-Healing: If a container crashes or a hardware node goes offline, Kubernetes instantly detects the failure and automatically spins up an identical replacement container to maintain your desired state. Auto-Scaling: If your web traffic suddenly spikes during a flash sale, Kubernetes can automatically scale up the number of running containers to handle the load, scaling them back down when traffic subsides to save cloud spend. Service Discovery & Load Balancing: Kubernetes automatically assigns containers their own IP addresses and groups them under a single DNS name, evenly distributing incoming traffic so no single server gets overwhelmed. 4. Key Differences: Side-by-Side Comparison To clearly draw the boundaries between these two tech giants, let’s look at how they handle core operational challenges side-by-side: Operational Feature Docker Kubernetes

Software development, Technology & Innovation

CI/CD Pipeline Best Practices

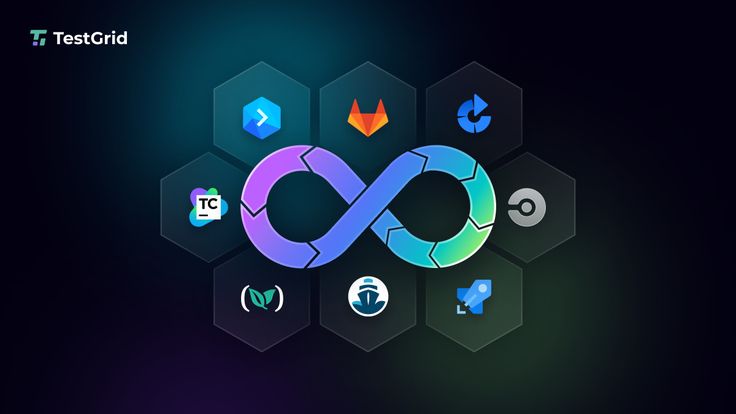
CI/CD Pipeline Best Practices: The Definitive Guide to Building Bulletproof Automation If you’ve ever hit the “deploy” button with your eyes closed, holding your breath and praying to the software gods that nothing breaks, you’re not alone. We’ve all been there. In the early days of development, moving code from a local machine to a live server was a high-stakes gamble. It involved chaotic manual file transfers, brittle scripts, and an overwhelming amount of guesswork. The introduction of Continuous Integration and Continuous Deployment (CI/CD) promised to fix all of that. It offered a world where every code change travels safely down a pristine, automated assembly line straight into production. But here’s the harsh reality: simply having a CI/CD pipeline isn’t enough. A poorly designed pipeline is worse than manual deployment. It acts as a force multiplier for bad habits, automatically pushing broken code, security vulnerabilities, and configuration errors to production at supersonic speeds. If your build times are stretching past 45 minutes, your automated tests are flaky, or your developers are constantly bypassing the system, your pipeline is a bottleneck, not an accelerator. To transform your delivery workflow into an enterprise-grade engine, you need to move past basic automation and embrace architectural excellence. This comprehensive guide breaks down the definitive CI/CD pipeline best practices to help your engineering team ship stable, secure code multiple times a day with absolute confidence. 1. The Blueprint of a World-Class CI/CD Pipeline Before diving into specific best practices, let’s map out what a mature, modern CI/CD architecture actually looks like. Think of your pipeline as a series of progressive quality gates. Code enters as raw, unverified text and emerges as a fully monitored, production-ready application container. [ DEVELOPER ] Pushes Code / Opens Pull Request │ ▼ ┌────────────────────────────────────────────────────────┐ │ 1. THE COMMIT GATE (Continuous Integration) │ │ • Code Linting & Static Analysis (SAST) │ │ • High-Speed Unit Testing │ │ • Dependency Vulnerability Scanning │ └───────────┬────────────────────────────────────────────┘ │ (Passes) ▼ ┌────────────────────────────────────────────────────────┐ │ 2. THE ARTIFACT GATE (Build & Package) │ │ • Deterministic Container Compilation (Docker) │ │ • Container Image Security Scanning │ │ • Push to Secure Immutable Image Registry │ └───────────┬────────────────────────────────────────────┘ │ (Passes) ▼ ┌────────────────────────────────────────────────────────┐ │ 3. THE VALIDATION GATE (Continuous Delivery) │ │ • Automated IaC Environment Provisioning │ │ • Integration & End-to-End User Testing │ │ • Performance & Load Profiling │ └───────────┬────────────────────────────────────────────┘ │ (Passes) ▼ ┌────────────────────────────────────────────────────────┐ │ 4. THE DEPLOYMENT GATE (Continuous Deployment) │ │ • Canary Release / Blue-Green Progression │ │ • Automated Drift Detection & Observability Rollback│ └────────────────────────────────────────────────────────┘ Every stage of this blueprint must be optimized for speed, clarity, and isolation. If a failure occurs at the Commit Gate, the pipeline should abort immediately, giving the developer instant feedback before expensive cloud infrastructure is spun up down the line. 2. Commit and Integration Practices (The CI Foundation) The foundational philosophy of Continuous Integration is simple: integrate early and integrate often. The longer code sits isolated on a developer’s branch, the more painful the eventual merger will be. Shift to Trunk-Based Development For years, long-lived feature branches and complex merging strategies (like traditional GitFlow) were the industry norm. However, these models inherently create massive integration bottlenecks. Developers work in isolation for weeks, resulting in epic code review sessions and devastating “merge conflicts” that derail entire release schedules. Modern high-performing teams utilize Trunk-Based Development. In this workflow: Developers commit their changes to a single, central branch (usually named main or trunk) frequently, often multiple times a day. Feature branches are short-lived, lasting no more than 24 to 48 hours. This constant integration ensures that the entire engineering team is always working on top of the latest single source of truth. If a code conflict occurs, it’s tiny and easily resolved in minutes, rather than days. Treat Build Failures as Production Outages A CI pipeline is completely useless if developers get into the habit of ignoring broken builds. If your pipeline notification channel is filled with red error marks that everyone ignores because “Oh, that test always fails on Fridays,” your automated safety net has collapsed. Adopt a strict team culture where fixing a broken build is the highest priority task. If a commit breaks the pipeline, all engineering focus shifts to either fixing the underlying issue immediately or reverting the breaking commit. A broken main branch stops the assembly line; keeping it pristine ensures that the path to production remains open for everyone at all times. Commit Once, Build Once A terrifyingly common anti-pattern is compiling code or rebuilding application binaries multiple times as they progress through different pipeline environments. For example, building a Docker image for staging, and then building an entirely separate Docker image from the same source code when moving to production. This completely invalidates your testing. How do you prove that a subtle dependency change or compiler variance didn’t slip into the production build that wasn’t present during staging validation? The rule is absolute: Build your binaries, packages, or container images exactly once early in the pipeline. Package that build as an immutable asset, tag it with a unique cryptographic identifier (like a Git commit SHA), and store it in an artifact repository. That exact identical asset must be promoted through staging, pre-production, and production without ever being recompiled. 3. Optimizing for Speed: The 10-Minute Rule Speed is the lifeblood of software delivery automation. If a developer has to wait an hour to see if their code change passed automated validation, they will switch context. They’ll grab coffee, check social media, or start writing entirely new features. By the time the pipeline notifies them of an error, they’ve lost their train of thought, and fixing the bug takes twice as long. The gold standard for engineering organizations is the 10-Minute Rule: Your commit pipeline (from pushing code to receiving an integration pass/fail notification) should take less than ten minutes. Here is how you engineer a lightning-fast pipeline: Parallelize Test Execution Don’t run your test suites sequentially on a single runner

App Development, DEVOPs, Software development

DevOps Automation Explained

DevOps Automation Explained: The Ultimate Guide to Accelerating Software Delivery In the fast-paced world of modern software development, speed, agility, and reliability are no longer optional—they are critical to survival. If your team is still manually deploying code, configuring servers by hand, or running test scripts line by line, you are falling behind. Enter DevOps Automation. It’s the engine that powers high-performing engineering teams, transforming chaotic, siloed workflows into streamlined, automated delivery pipelines. But automation isn’t just about replacing human effort with scripts; it’s about shifting culture, breaking down traditional silos between developers and operations, and building a resilient ecosystem where software can be built, tested, and shipped at scale with minimal friction. Whether you are an engineering lead looking to scale your infrastructure, a developer tired of dealing with “it works on my machine” bugs, or a business leader aiming to outpace the competition, this comprehensive guide will break down everything you need to know about DevOps automation. 1. What is DevOps Automation? (Beyond the Buzzwords) To truly understand DevOps automation, we first need to strip away the marketing jargon. At its core, DevOps is a cultural and technical philosophy aimed at unifying software development (Dev) and IT operations (Ops). Historically, these two teams operated in complete isolation: Developers were incentivized to move fast, ship new features, and push boundaries. Operations teams were incentivized to maintain system stability, minimize downtime, and resist risky changes. This inherent tension created a massive bottleneck. Code would sit waiting for manual security reviews, server setups took weeks, and deployments were high-stress, late-night events prone to human error. +———————————–+ | Traditional Siloed Model | | [Dev Team] ——> [Ops Team] | | (Move Fast) Wall (Maintain) | | of Chaos | +———————————–+ VS +———————————–+ | DevOps Loop Model | | (Plan -> Build -> Test -> | | Deploy -> Monitor -> Feedback) | | Continuous & Automated | +———————————–+ DevOps automation is the practice of injecting technology across this entire lifecycle to automate repetitive, manual tasks. It bridges the gap between these teams, allowing software to flow from a developer’s laptop to production seamlessly, safely, and predictably. Why Automation is the Heart of DevOps Without automation, DevOps is just a nice idea. You can tell your teams to collaborate more, but if their tools and processes don’t support that collaboration, they will default to old habits. Automation provides the shared framework—the “single source of truth”—that allows both development and operations to achieve their goals simultaneously: speed and stability. 2. The Core Pillars of a DevOps Automation Framework A mature DevOps automation strategy isn’t built overnight. It spans across several distinct but interconnected phases, often referred to as the continuous delivery pipeline. Let’s break down these essential pillars. Continuous Integration (CI) Continuous Integration is the practice of automating the integration of code changes from multiple contributors into a single software project. Instead of developers working in isolation on massive feature branches for weeks, they merge their code back into a central repository (like GitHub or GitLab) frequently—often multiple times a day. Every time code is pushed, an automated CI server takes over. It automatically triggers: Code Compilation: Building the application to ensure there are no syntax or structural compilation errors. Automated Testing: Running unit tests and code linters to verify that the new changes don’t break existing functionality or violate code quality standards. By catching bugs early in the development cycle, CI prevents the dreaded “integration hell” that happens when teams try to merge massive amounts of conflicting code right before a major release. Continuous Delivery (CD) & Continuous Deployment While CI handles getting code into a stable, buildable state, Continuous Delivery and Continuous Deployment (often collectively called CD) handle getting that code into production. Continuous Delivery: In a CD workflow, every successful code change that passes the CI pipeline is automatically built and packaged. It is then automatically deployed to a staging or testing environment. However, the final push to the live production environment requires a manual human trigger (e.g., clicking a “Deploy” button). Continuous Deployment: This takes automation a step further. There is no manual intervention. If a code change passes every single automated test in the pipeline, it is automatically deployed directly to production. [ Code Change ] │ ▼ ┌────────────────────────┐ │ Continuous Integration │ -> Code Merged, Built, & Unit Tested └──────────┬─────────────┘ │ (Passes) ▼ ┌────────────────────────┐ │ Continuous Delivery │ -> Staging Deployment & Advanced Testing └──────────┬─────────────┘ │ ├─► (Manual Approval) ──► [ Production ] (Continuous Delivery) │ └─► (Automated Push) ──► [ Production ] (Continuous Deployment) Infrastructure as Code (IaC) Traditionally, provisioning servers, configuring networks, and setting up databases required operations teams to manually click through cloud consoles or run terminal commands on individual machines. This approach is slow, unscalable, and heavily prone to configuration drift (where environments that are supposed to be identical slowly become different over time). Infrastructure as Code solves this by treating your infrastructure exactly like software code. You define your servers, storage, networks, and configurations in descriptive configuration files (using formats like YAML or JSON). These files are stored in version control alongside your application code. When you need to spin up a new environment, an IaC tool reads the configuration and provisions the exact infrastructure automatically. This guarantees that your development, staging, and production environments are identical replicas, eliminating environment-specific bugs entirely. Continuous Monitoring and Logging Automation doesn’t stop once code is live in production. In fact, that’s where some of the most critical automation begins. Automated monitoring and logging tools constantly track the health, performance, and security of your applications and infrastructure in real-time. Instead of waiting for users to tweet about a crash or submit a support ticket, automated monitoring systems use predictive alerts to notify engineering teams the moment performance begins to degrade—such as spikes in CPU usage, memory leaks, or an unusual rise in 500 error codes. Advanced monitoring systems can even trigger automated remediation scripts, like spinning up additional cloud servers to handle unexpected traffic spikes or

Scroll to Top